LIDAR is one of the most powerful tools available to solar installers. Its ability to help you complete tasks like estimating tree heights and determining the slope of a roof face — all without a site visit — makes your sales, design, and installation processes run more smoothly, more quickly, and more accurately.
Aurora just announced a huge LIDAR update, and now HelioScope will be offering LIDAR to enterprise customers in beta. HelioScope will use the same LIDAR data that Aurora does. This impressive data set covers 98.6% of the U.S., and boasts an average point density from 9.2-12.8 points per square meter.
Unlike flat images from Google Earth, or other satellite images, LIDAR data can accurately provide valuable information, such as the height of buildings and trees, and the pitches of roofs — data that is quite important for determining the size and energy yields of commercial and utility-scale installations. Said differently, LIDAR is a game-changer for commercial solar designs in HelioScope.

To learn more about exactly what LIDAR does, how it can help your company, and more details about our latest update, check out our blog on the topic.
Of course, the main question you likely have is, “How do I use it?”
How to model using LIDAR in HelioScope
(Please note that this feature is currently only available to Enterprise customers. To learn more about becoming an Enterprise customer, please reach out to sales@helioscope.com.)
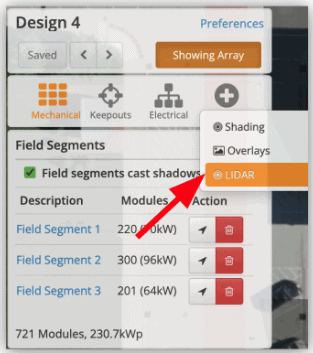
1. After completing your site design, click on the LIDAR button under the Advanced setting on the Design Menu.
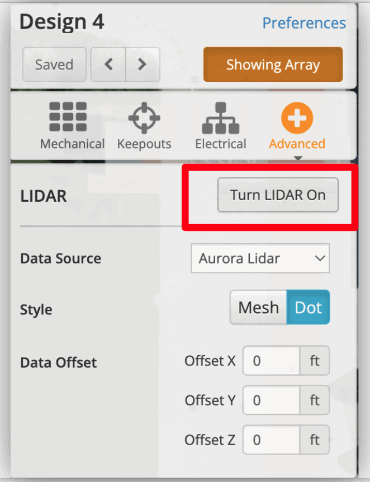
2. Click the “Turn LIDAR On” button next to LIDAR.
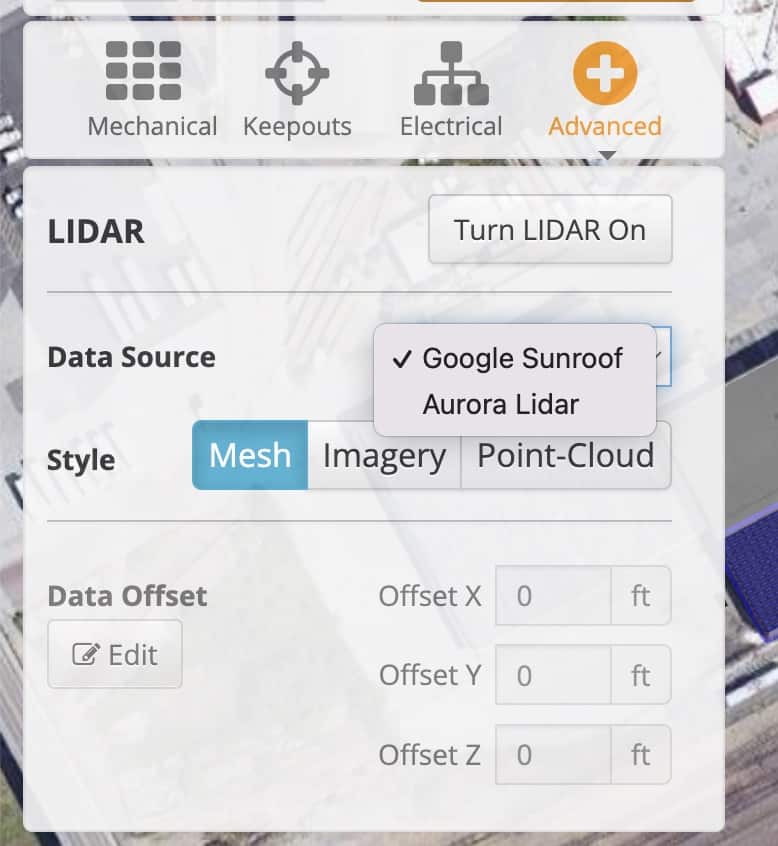
3. Click next to Style to toggle between Mesh, Imagery, or Point Cloud (Dot) LIDAR styles.
4. Adjust the LIDAR data by using the x, y, and z Data Offset fields.
(Note: You can also view or switch the source of LIDAR data in the LIDAR settings menu.)
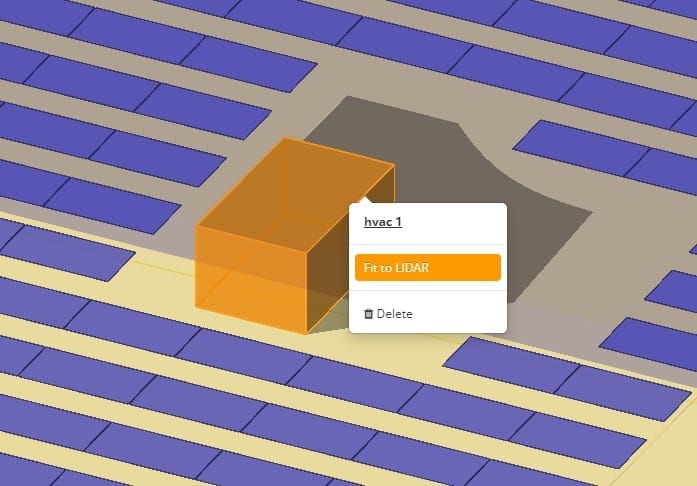
To use LIDAR in HelioScope, simply right click the roof (Field Segment) and choose “Fit to LIDAR” for fixed tilt, or “Fit to LIDAR (Height and Tilt)” to fit not only the height but also the pitch on Flush Mount Racking.

You can also use “Fit to LIDAR” to get accurate heights of roof obstructions and keepouts by simply right clicking on the keepout and selecting “Fit to LIDAR”.
It’s that simple. You can click here to see HelioScope’s LIDAR availability map.
This is only the beginning. We’re constantly working to make LIDAR more useful for customers, so stay tuned for more in the coming months.


